Know before you go. Incline reservations. Training. What to wear & bring. Incline parking. Experience & Expectations. Published June 27, 2023. Updated November 13, 2023.
The Manitou Incline (or the Incline for short) has been on our bucket list since we moved to Colorado Springs at the end of 2022. Since it was winter at the time and we were not acclimated to the elevation, we waited until Spring to do our hike. We lived here almost six months before taking this on.
I’m surprised there is not more info out there on this hike from locals. Many people from here have done this hike before it was as popular and as regulated as it is now. Some are unwilling to pay for parking required in Manitou Springs or want to stay away from the touristy attractions. Now that we have conquered this infamous hike, we wanted to provide the most up-to-date and accurate info to help you plan your hike with the right expectations.
What is the Manitou Incline? Quick History & Fact Check
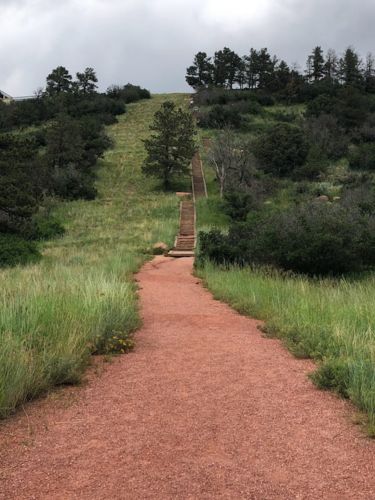
The Manitou Incline is an iconic hiking trail of stairs that was built over the remains of a former railway located in Manitou Springs on the eastern side of Pikes Peak. It was originally constructed in 1907 to transport pipes up the mountain. After the original construction was complete it became a tourist attraction and was operated by the Pikes Peak Cog Railway.
In 1990, a rock slide washed out the railbed and the Cog Railway decided not to repair the tracks. The rails were removed but locals started climbing the remaining ties for a workout.
There were some legal conflicts on how to move forward as the Incline was technically owned by three different entities. The National Forest Service wanted to preserve the land and there were growing parking concerns for the Cog Railway and City of Colorado Springs due to the growing popularity of the hike.
Hikers were discouraged from coming on private property but it didn’t stop people. The trail grew in popularity. In 2013, the legal conflict was resolved and the trail was open to the public to hike.
The Incline closed temporarily at the start of the pandemic in 2020 and the current reservation system came about after reopening on August 4, 2020. The City of Colorado Springs took over the online reservation system.
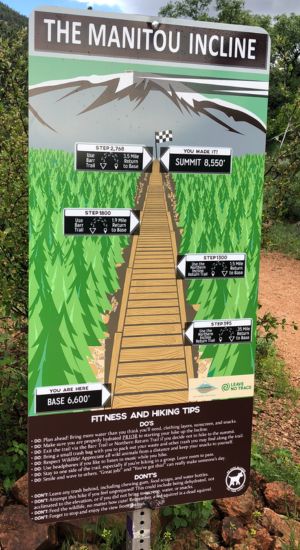
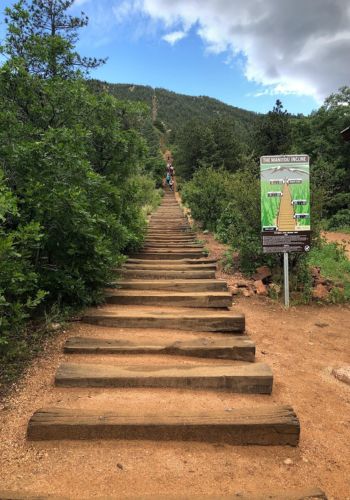
Steps: 2,768 stated at the trailhead, however, this is subject to change slightly (due to trail maintenance) I noticed there were a few places where the step height was bigger and even a tree branch growing through.
Elevation gain: 2,011 feet in .88 of a mile
Average Grade: 45%
Steepest Grade: 68% (after the false summit)
Time to Hike: Plan for about 3 hours total on average. It could take an hour to 90 minutes for average hikers to reach the summit and then an hour or so on the Barr Trail return. It might be faster (under an hour) for athletes or experienced hikers
Records:
Many people have done this hike a crazy amount of times in a short amount of time, it is mind-boggling! Here are just a few highlights:
Fastest Known Time for Ascent: The most current record for the fastest time to reach the summit is 17 minutes and 25 seconds on September 9, 2022, by a Swiss Mountaineer Remi Bonnet. * Source: fastesttime.com
The first “Inclination” record of 13 Incline trips in one day was first set by a local resident Ed Baxter who was 58 years old when he set the record in 2012. *source wikipedia/PikesPeakSports.us.
The One Year Incline Ascent Record is currently held by a local Greg Cummings (age 62 at the time) who set the record on January 11, 2020 with 1825 ascents in 365 days. *Denver Gazette/Outtherecolorado
The Manitou Incline is taller than the Empire State Building.
The Empire State Building is 1,250 feet tall (without counting the spire and antenna). It has 102 floors and 1872 steps. The Manitou incline is 2,011 feet elevation gain and 2768 steps.
The annual Empire State Building Run-Up attracts many athletes and runners each year. Record times for this run are slightly under 10 minutes for men and women. Yikes!
Let’s get into the details of how you can prepare and attempt to climb this iconic bucket list item. You don’t need to be an athlete but you should prepare and know what you are getting into. First, you need to pick a date and reserve your time.
Manitou Incline Reservations:
Yes, you need a reservation, even though the hike itself is FREE. Technically you can do the hike without a reservation, but to ensure you can go, especially if you are visiting I recommend making a reservation as advised.
In the regular season (March through November) starting at 6 am, up to 65 people can reserve every half hour. The number of people allowed to start per half hour decreases throughout the day. After 3 pm, 25 people per half hour can reserve times until close at 6:30 pm.
Reservations should be made at least a week or two ahead of time minimum for weekend days. It will be less crowded on a weekday. You will be able to see options for the current month and the next so you can schedule 4-8 weeks out at the most. The first time we hiked, we made ours a month in advance because the first date we were considering, we waited until the week of because we weren’t sure of a possible scheduling conflict and then it was too late.
We have also done this hike once without a reservation. The monitor at the trailhead was serious about addressing everyone approaching the trailhead and they may let you on the hike without a reservation. If the trail is busy with hikers who have reservations, they will have priority.
It’s honestly not a bad system due to the popularity of the hike. It helps regulate a large flow of people to a famous attraction which makes the experience less crowded and more enjoyable.
Make a reservation here: Manitou Incline | City of Colorado Springs
Consider timing. During spring and summer, this should be a hike you start early, unless you want to hike in the rain or heat. In my personal opinion, I would not start this hike later than 10 am in the spring or summer.
During the fall and winter, you could look at a later time, also being mindful of the current weather.
The sun is intense at this elevation and there is little shade the further you ascend. In the spring it rains here frequently in the afternoons. This year we had a month straight of daily rainstorms with lightning, thunder, and sometimes hail out of nowhere. The storms usually start around noon. You want to be off the incline and past the summit before noon!
How do I train for the Manitou Incline? Preparation Tips
In all transparency, the best training you can have for this hike is #1 being in the best physical shape possible, whatever that means for you and your personal goals, and #2 living in Colorado or living at an elevation above 6000 feet. Even with those two factors, this hike will still be challenging and kick your butt to some extent.
Elevation affects everyone differently and altitude sickness is common. If you are coming from another state at sea level, it will help if you do this hike later in your trip after you have ideally at least 48 hours minimum at a higher elevation to adjust.
Just to be real, this is a difficult trail and even if you are in really good shape, the altitude will make it more challenging. It took me being here a few weeks after moving here if not over a month for me to feel fully acclimated. Don’t feel bad if you aren’t able to perform at your usual physical best in Colorado. Everyone is different. Check out my article about travel tips for first-time visitors to Colorado.
The best way to train for this hike if you have no mountains nearby is doing stairs in a tall building with as many levels as possible such as a parking garage or hospital.
Even though we live in Colorado (at around 6500 ft), we have busy weekly schedules working full-time jobs and when we do have time to hike the weather has been unpredictable. I did not get out consistently in advance to do hikes with much elevation to help prep.
I started incorporating more stairs into my routine two months in advance by doing the stairs in our apartment building and running intervals on the treadmill. Jorge, my husband, does mostly calisthenic workouts.
In comparison, going up 3 flights of stairs and then down and then up again isn’t comparable to a staircase that is taller than the Empire State Building with thin air quality. From what I understand (without digging into the math) most treadmills can go up to 10-15% grade. It’s a start but without finding a nearby steep mountain, it’s hard to replicate the actual conditions to practice for the 45% to 68% grade of the actual Incline.
The bottom line, doing cardio in combination with strength training such as squats and lunges to build your leg muscles and incorporating extra stairs into your life are great places to start. You can only control your dedication and effort to your personal fitness. This will reward you or teach you a lesson later.
Your biggest competition should be yourself and setting goals to improve your personal fitness to the next level as much as possible. Regular people who put in effort and preparation as well as the fittest athletes can do this hike.
Side note to the ladies out there, if you are on a heavy time in your monthly cycle, save this hike for later. I used to push myself constantly by doing hard HIIT workouts even through my cycle, but this is bad for your hormones. I am not a doctor and this is not medical advice but I recommend saving this hike for when you are at your best. You need to be at peak performance for this hike.
Mental preparation and having the right expectations are just as important as physical preparation for this hike. You will need mental willpower to complete this hike. Once you get to the false summit, it gets VERY steep, and you will be tired.
Remind yourself of why you chose to do this specific hike. You will exchange hellos, and possibly hear stories of fellow hikers you meet on the trail who are coming from near and far to take on this challenge. Focus on how amazing it will feel to tell your friends and family that you were able to conquer the Incline!
Alternatives:
A beginner starting point that is available locally in Colorado Springs is the Stairway to Heaven trail at the Colorado Springs US Airforce Academy. It is used for athletic training and is open to the public if you want to try it.
All Trails App: USAFA Stairs
This is a .3-mile staircase workout with 200 stairs. The stairway starts at 6846 ft and gains 167 ft in elevation with a 17% grade. This will be slightly more challenging than a treadmill incline plus the elements.
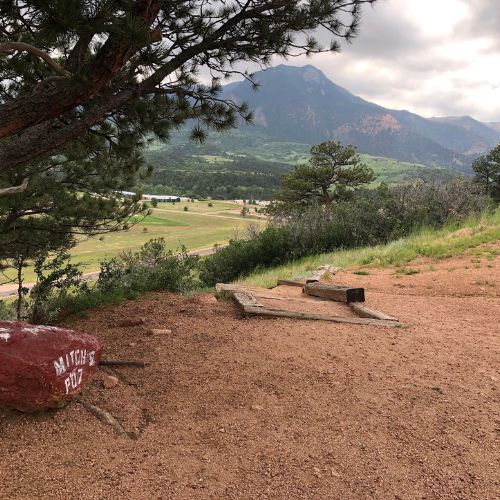
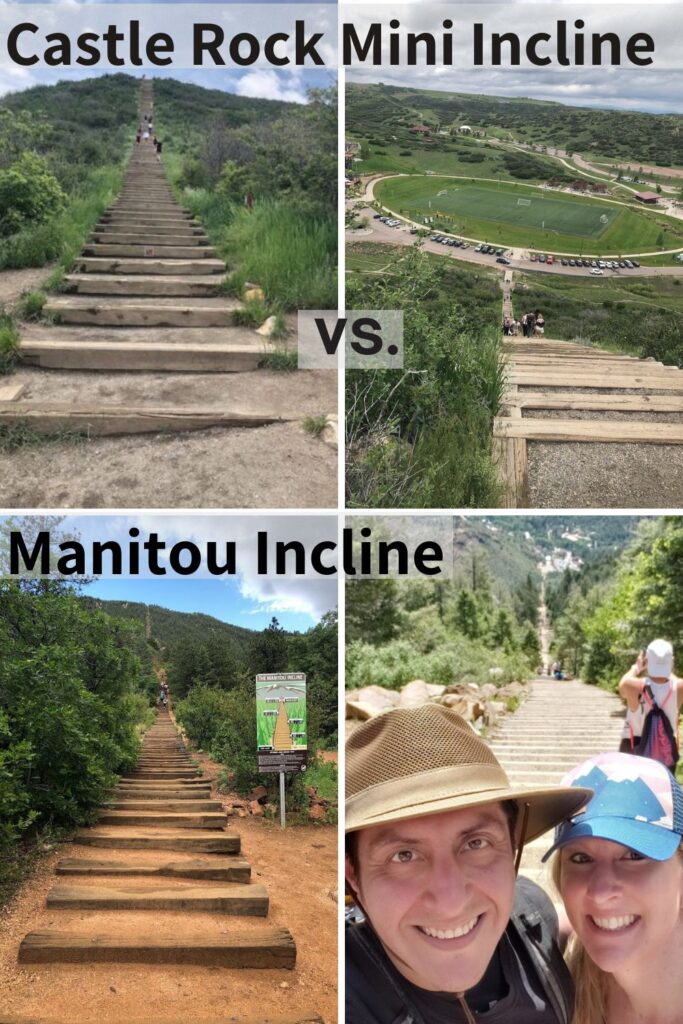
A second option is to consider the “Mini Incline” up in Castle Rock (or Challenge Hill) first as practice if you are uncertain about doing this hike. This hike is a half hour from Colorado Springs on the way to Denver at Philip S. Miller Park. The hill has only 200 steps. Beware! They are steep. Steeper than most of the Incline.
This makes a great stop to add to your trip as there are a lot of ways to be active here. There is an adventure playground with outdoor athletic training and a zipline.
All Trails App: Philip S Miller Park Challenge Hill
The best decision we made to prepare was doing the Castle Rock Mini Incline 6 days before our Manitou Incline experience. The lessons we learned from that set us up for success. I felt worse after Castle Rock than the Manitou Incline because of my breathing and we both pushed ourselves harder than our bodies told us to.
Comparison of Castle Rock Mini Incline vs Manitou Incline:
A local non-staircase option we like is Pulpit Rock Summit
A city view hike that isn’t too long with amazing views that will test out how you are in the elevation.
All Trails App: Pulpit Rock Trail
Address: 5547 Nevada Frontage Rd, Colorado Springs, CO 80918
Other Basic Preparation Tips:
Drink a ton of water with minerals the day before. Do not drink alcohol the night before this hike. Eat well the day before and go to bed early!
What to wear/bring on the Incline Hike:
Wear Layers: Layers are essential in Colorado weather. Aside from your base layer, you should at least bring a light long-sleeve layer and a rain jacket. If you are worried about extra weight, at least take an emergency plastic poncho in case.
Unless it is winter, I’d highly recommend shorts or trail pants that can become shorts. I regret that I wore yoga pants on this hike (mostly because I wanted pockets). It was hot in the sun and there is little shade available.
Shoes: I prefer trail runners because they are lightweight. It’s really up to your comfort level. If it does rain, you will want to have more grip on your shoes than just tennis shoes. I do not like stiff hiking boots because they are too rigid for me. You will want to keep light on this trial.
Hat: Protection from the sun on your face and from the elements.
Sunblock: The trail has little shade, especially at the top. The sun is stronger at high elevations and you will burn faster here even if you don’t usually burn. Even in the wintertime, you can still get sunburned at high altitudes. Chapstick is also a good idea for dryness.
Water/Hydration pack: I recommend taking at least 1.5- 2 liters for this hike. I prefer hiking with a camelback so I can be hands-free. This way you don’t have to worry about balance, especially if you are nervous about height. It is important to pack light, but also be prepared.
Do NOT skip taking water!!! It amazes me how many people hike without water, on this hike and others, there are always a few. You need water for this and all hikes.
Snacks: Protein like beef jerky or nuts & dried fruit will help give you a pick-me-up to be resilient for the journey. Pick a snack that is going to give you energy and motivation!
Trekking poles: Optional. I saw a lot of people with them in their packs but none using them. It would give you stability with the steeper steps, but I am not a fan of them in general.
Safety/First Aid Kit: I’ve made a habit of bringing the 10 essentials on all my hikes. You can put together your own similar version.
For reference: https://americanhiking.org/resources/10essentials/https://americanhiking.org/resources/10essentials/
Bathroom Info: There are some port-o-potties at the top of the Incline. I cannot speak to their condition. There are a lot of people on this hike so there isn’t much privacy if you need to go out in the wild.
We used bathrooms at the Cog Railway before and after the hike. They are in the Waiting Room of the station where the train boards. Beware, you will have to go down more stairs to get to them which is a bit rough after the hike!
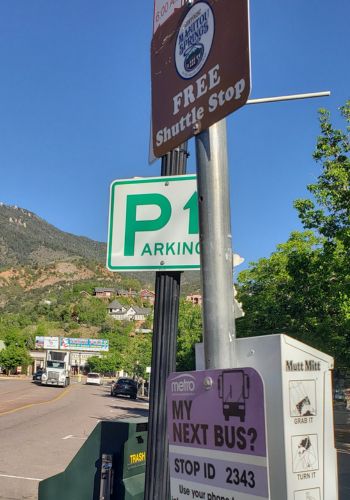
How do I get there and what is Parking like for the Manitou Incline?
In all honesty, parking in Manitou Springs is a bit intimidating and confusing at first. First, you’ll have to accept that you will have to pay (probably more than you want to) to park in this small town to be able to enjoy spending time here.
When we first came to Manitou Springs after moving here, we paid to park while we explored downtown. We signed up for parking expiration reminders AND extended our time. We got a bit distracted on the walk back and missed the meter by a few minutes. The parking ticket police lady was already ticketing another car in our area. It ended up costing us over $60 and made me not want to come back.
If parking or crowds of people stress you, take a deep breath and pack a little patience into your vacation. It’s not too bad if you do research ahead of time and know your options. Once you find parking, you’ll need to take the free shuttle to get to the hike. It’s worth it!
Trust me when I say, not only is the Incline a challenging hike on its own but if you choose to walk from parking to the hike as suggested on the website, you will exhaust a lot of needed energy before you start. If this is your first time, this is NOT how you want to start your adventure. It is 1.3 miles from the Hiawatha Gardens Parking lot. The last part of it is a steep uphill walk through a residential area and you will regret it. It’s a terrible idea unless you are an athlete looking for a challenge or a returning hiker who knows what you are getting into.
Parking options:
Hiawatha Gardens: 10 Old Mans Trail; Manitou Springs, CO 80922
1.3 miles from Incline. Pay by the hour.
Biggest parking lot in Manitou Springs with 155 spaces and free shuttle pickup in the lot.
Cost per hour increases by the number of hours you are there: you will want to do at least 4 hours minimum to account for wait time with the shuttle and more if you plan on spending time in Manitou Springs after. Sign up to get notifications and you can extend your parking by text.
Iron Springs Chateau: 444 Ruxton Avenue; Manitou Springs, CO 80829
A private historical building with parking for the Incline. The closest parking to the Incline. Great if you want to just do the hike and leave. You don’t need the shuttle.
Payment is $15 CASH to the attendant for 4 hours. If you get a spot here you are lucky!
A few other notes about parking:
Cog Rail and Barr Trail parking are the closest lots right next to the Incline but you cannot park here. Even Cog Rail goers can only park in the lot for a limited time with proof of ticket only 30 minutes before departure.
The Barr Lot is for Barr Trail hikers only and NOT the Incline even though it’s where you will exit the hike if you come down the Barr Trail. Also, it’s the most expensive so you also don’t want to park there ($25 a day).
There are a few other lots you can consider, or you can do paid parking on the street and hop on the shuttle. Perhaps you will get lucky. Parking Locations | Manitou Springs, CO (manitouspringsgov.com)
Our personal parking preference:
We prefer the Smischny Lot because it is easy to get to and avoids busy areas of Manitou Springs. As of date, it’s a flat $15 all day to park here and there are only 40 spaces. Consider the time you need to ride the shuttle, do the hike, and if you spend time in Manitou Springs before or after your hike, you could easily spend 5-6 hours here. With the flat daily rate, you can enjoy your day without worrying about the parking police. There are far fewer people in this lot early morning.
Smischny Lot: 1134 Manitou Ave. Manitou Springs, CO 80829
$15 all day or $2 per hour
5-minute walk to the free shuttle
From the Smischny lot, you will walk an easy (flat) 5 minutes into Downtown Manitou to be picked up by the free Cog Rail & Incline shuttle. It’s a scenic and enjoyable walk by Fountain Creek that runs through Manitou Springs. You’ll know you are heading in the correct direction as you walk by a bear statue and a liquor store, and hear the sound of Fountain Creek which runs through Manitou Springs.
The shuttle stop is across the street from a beef jerky store in case you need a last-minute snack. Beef jerky is my favorite hiking snack.
The Actual Hike – Going Up the Incline
You will check in with the attendant at the base of the Incline during your scheduled time. They aren’t strict about timing if you have a reservation. If you are running late, you will still be allowed on the Incline with proof of reservation. Walk-ups are allowed if there is availability. If you cannot make it, you should notify the reservation email.
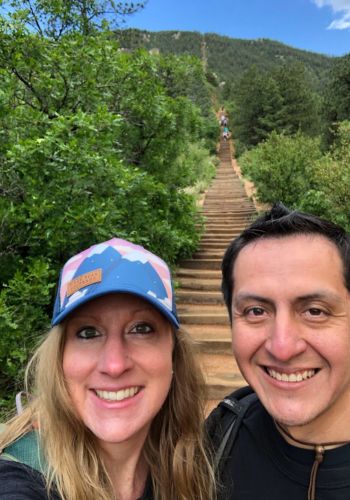
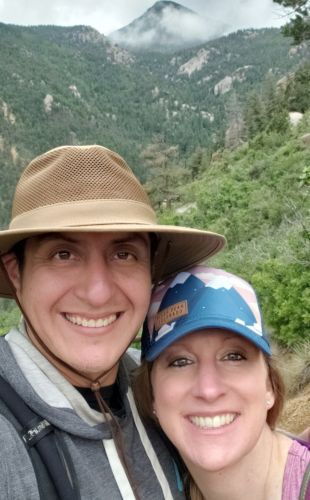
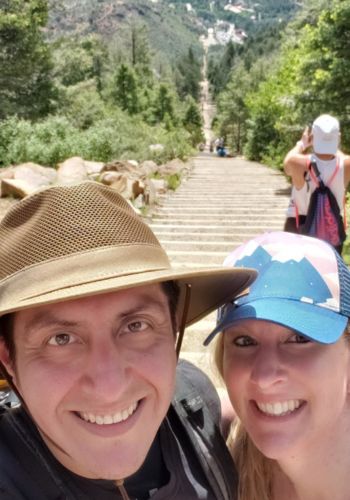
Take a “before” selfie at the trailhead while you are still smiling, excited, and looking put together. Compare it to your ending selfie at the top later.
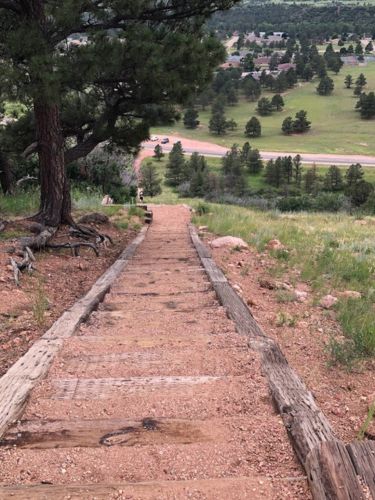
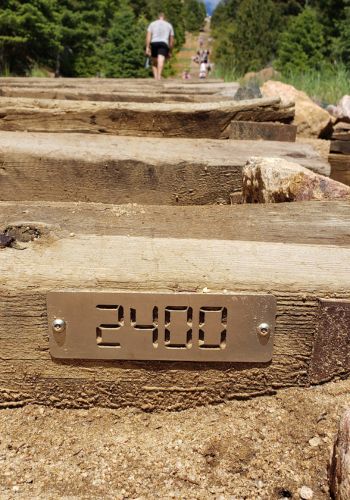
The trail starts gradually and feels achievable. The steps are a shorter distance apart at the beginning and steeper at the end. You might not notice right away, but there are markers every 100 steps to show how many steps you’ve climbed.
Take your time and go slower than you think you should at the beginning to conserve energy and adjust to the altitude.
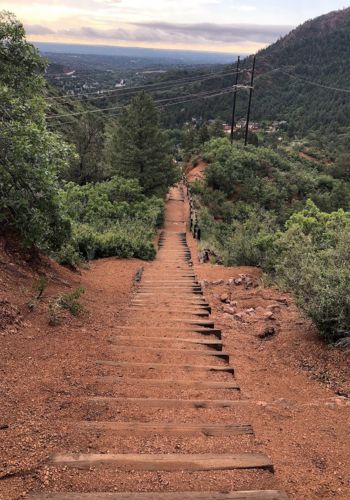
In comparison, the Castle Rock Mini Incline steps are a taller step up and a consistent height the entire way. On the Manitou Incline, the step size varies along the trail. Some steps have become much steeper as adjustments have been made to the trail. There are a few sections where you are going up a wooden staircase for about twenty steps and it feels like a little break.
Important tip regardless of physical fitness level: BREATH THROUGH YOUR NOSE as much as possible. If you are starting to mouth breath heavily, take a break or even a short pause to catch your breath and climb at a slower pace. Slow and steady with breaks and slow breathing through your nose will help.
Drink water regularly throughout your hike, even a small amount at a time to keep hydrated. This helps prevent altitude sickness.
When you take breaks, it’s better to look back at the amazing views than to think about how much further it is and question yourself if you are looking at the real or the false summit.
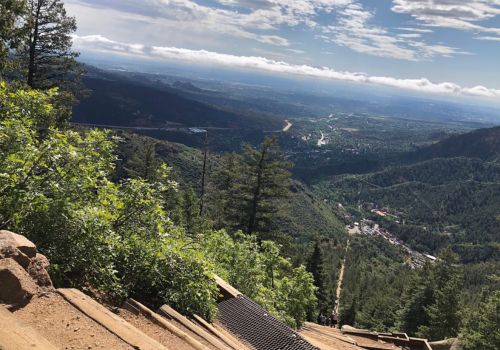
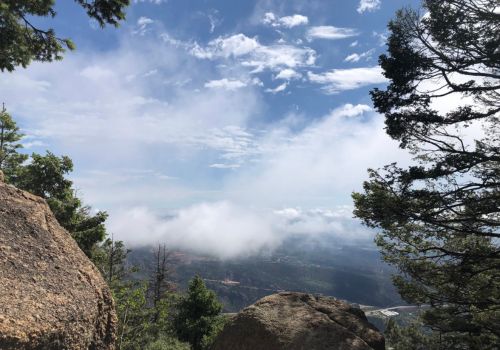
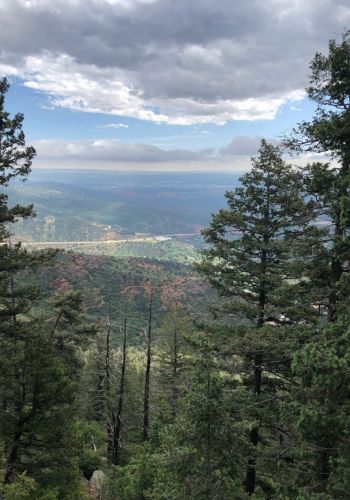
You will see amazing views of the Garden of the Gods and miles and miles beyond Colorado Springs. You might be even with or above the clouds in the distance.
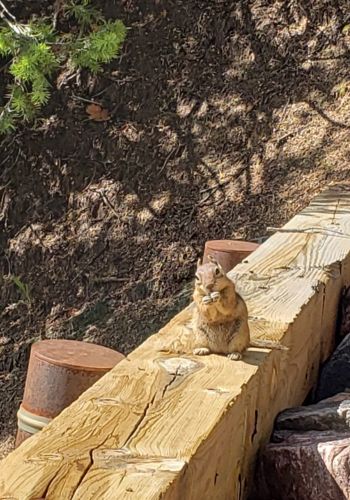
Wildlife, specifically ground squirrels are known to be friendly and abundant on the Incline and the Barr Trail. Do not feed them! We encountered a sociable squirrel on the Incline who gave us quite the show.
As you are climbing higher, pay attention to your body. Altitude sickness is common. You don’t need to push yourself past your limits or worry about people passing you. Everyone has their own journey up the mountain.
If you are uncertain about your ability to continue at any point, take a break and know your options.
Bailout Options: What if I need to turn around?
It is strongly discouraged for hikers to go down the Incline steps unless special circumstances warrant it. It would be scary too because of the steep grade and goes against the flow of traffic.
You will encounter some very experienced hikers (or athletes) doing this trail at a fast pace and going down the stairs. You might even recognize that some of them have lapped you by the time you get to the top. Remember, this isn’t their first time! All fitness levels can do this hike with the right mindset.
If you are concerned about doing the full hike, plan or be willing to take one of the bailout trails when you have the opportunity. Now that you have a taste of what to expect and how your body responds, you can train and come back again.
There are THREE bail-out trails if you decide you have reached your limit. You can turn around at 395 steps (.35 mile return to base), 1300 steps (1.5 miles return to base), or lastly, at 1800 steps you can join the Barr Trail for return (1.9 miles Barr Trail parking lot).
There is no shame in stopping this hike if you are not feeling well. Only you know your body and your limits. It’s better to be safe than risk needing a rescue from this trail. It will be a long wait for rescuers to hike up and carry you out as there are no vehicles on this part of the mountain.
We know someone locally who was familiar with this trail but had to be rescued a few years back. They were stranded on the mountain during a thunderstorm. This is not the type of adventure anyone wants to have, especially if you are here on vacation.
Once you pass the 1800 step mark, you are committed. It seemed ok at first for me and then it got hard between 1900-2400 steps. So close but so far! It gets a lot more challenging with the steep grade. You are brutally aware of the false summit.
Keep pushing and take it slow, you can do this! It’s a mental fight from here to push past your perceived physical limits.
You will get a new adrenaline rush as you near the top and hear others cheering, and when you step over the finish line! Congratulations, a huge accomplishment! You can wear the Incline as a badge of honor and check your Colorado bucket list of epic hikes.

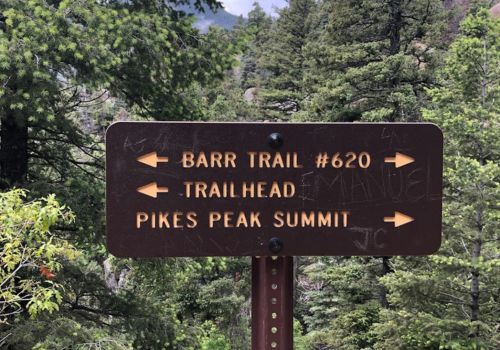
The view from the top is amazing! Pictures don’t do it justice. Take some time to rest, enjoy the victory, and eat a snack to replenish yourself to finish the hike. For the return down the mountain, you will take the Barr Trail. It’s all downhill from here!
Going Down the Incline
The Barr Trail goes from the base up to the top of Pikes Peak. You will be on the first portion of it going down and will meet several hikers and runners just starting their journeys. Local runners are conditioning themselves on this trail so be mindful of trail etiquette, especially at the bottom.
There is a sign cautioning Incline hikers not to run down the trail after the incline to prevent injury. Your legs may already feel like jello and you may let your guard down after being on an uphill climb for so long.
The fact that it says not to run, may be an incentive for some. Although it is exhilarating to run downhill with little effort, and you may be looking forward to a victory beer, I suggest taking your time on the way down and enjoying the views.
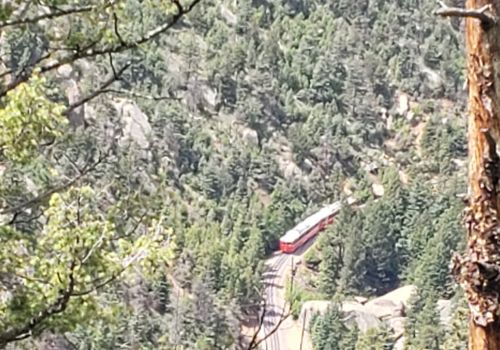
The clouds are low and look like cotton balls! If your timing is just right, you can hear the whistle blow of the Cog Rail train and spot it in the distance.
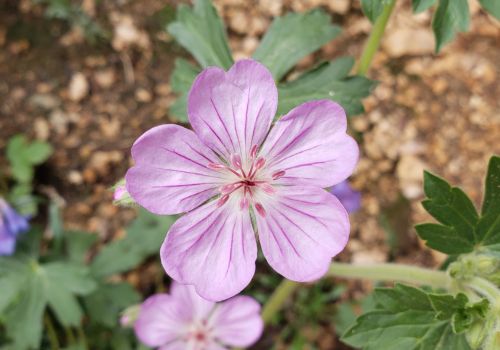
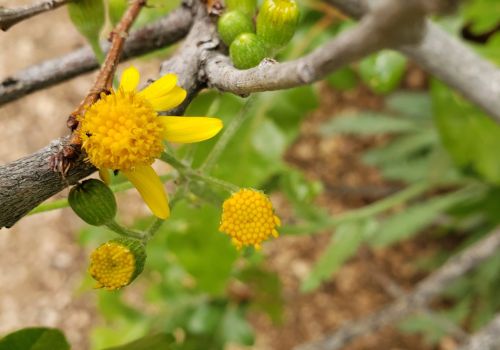
There are also a variety of wildflowers on the trail and a chance to see wildlife. You will miss out on the experience if you are in a hurry. Take your time and enjoy this trail!
You will arrive at the Barr Trail Parking lot near the Cog Railway parking lot. From here you will walk down the hill back to the Cog Railway area for a shuttle back to Downtown Manitou Springs and parking. You can use the restrooms in the Waiting Room but FYI you will need to go down a short flight of stairs to get to them and by now you will really feel it.
Things to do In Manitou Springs after the hike:
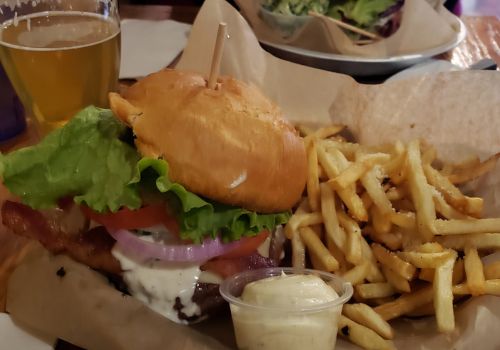
Manitou Brewing Co. is our top choice to reward our climb. We saved the “Hazy I Just Did the Incline” beer and Incline Burger for this occasion! They have a lot of great beer so you may want to try a flight. I also like the Mac & Cheese with added pulled pork and bacon.

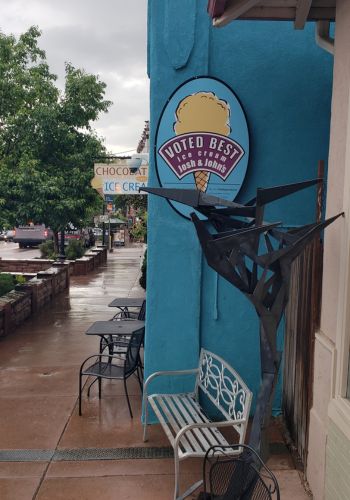
For dessert, our favorite local ice cream place Josh & Johns is up the street. They have a flavor of “Purple Mountain Majesty” we love with scratch-made waffle cones that will hit the spot.
There are many other food options and a ton of unique stores to explore in this artsy charming town if you have the energy. See our list of 45 Things to do in Colorado Springs for other local ideas on your vacation.
Conclusion:
We hope this has helped answer any questions you have about training, making a reservation, parking, and most importantly setting the right expectations for this mental & physical challenge as you plan your own journey up the Manitou Incline. I wish you the best!
Cheers, Leah & Jorge
Places to Stay Nearby:
Airbnbs in Manitou Springs: https://bestcoloradomountaingetaways.com/top-8-airbnbs-in-manitou-springs/
Airbnbs Cabins near Pikes Peak: https://bestcoloradomountaingetaways.com/airbnb-cabins-near-pikes-peak/
Airbnbs near Garden of the Gods: https://bestcoloradomountaingetaways.com/airbnb-vrbo-near-garden-of-the-gods/